Faster, Better and Safer
Part 1

by Dave Knipfer


I tried a new technique today that I think might be helpful to some of you ....   here are some photos and a description ...

One of my 'standard design' boxes requires me to form the box interior by hogging out nearly   7/8"   of material across a   3" wide part ......   until now I had done this with multiple and tedious passes across a dado blade ...

Today,   I started the machining on a new batch of   24 of these boxes .....   and when I got to that hogging-out part,   I just had to find a better way!

Basically .....   the technique that I came up with,   combines my tablesaw and bandsaw to allow me to essentially re-saw the bulk of the waste out without affecting the box sides .....

First ...   I used my tablesaw and a flat-ground rip blade to cut a kerf into the box interior.   For todays task,   I left about   0.050"   of extra material at the box bottom and the same spare material on the edges ....   just in case the idea was a huge bust.

Then,   I widened the kerf on one side only...   just enough to allow my   1/4"   bandsaw blade slide into it ...
Now,   its off to the bandsaw where I fixed a fence so that the blade rested at the bottom of that wider kerf .....   then,   I re-sawed the parts from kerf to kerf ...

When I was done with the re-sawing,   I had   24   boxes with the bulk of the interior waste removed very quickly... nbsp; and that bandsaw is much safer than any dado blade.

Now,   I need just one quick pass over the dado to remove the last of the waste...   and this part of the job is done.

I figure I saved about   10 minutes a box with this idea...   no big deal you say???   ...   well...   with   24 boxes,   that's   4 hours of time I'm not hunched over a dado blade...   and that a real saving to me!

Besides...   now I have   24 more pieces of firewood for those cold Maryland nights...   instead of more chips in my DC that I have to empty.

Those are not biscuit slots...   they are 1/8" wide by 0.220" deep mortises that I cut into the box bodies on my router table...   they will eventually mate up with a corresponding mortise in the box ends that I will join with a floating tenon and some epxoy.

I hope this idea is useful to someone out there.

Enjoy

Knipfer

Dave,
You sparked my thinking.   I've not done any boxes yet - of any size, but have been contemplating doing so.   Now, I don't have a band saw, but with your demo here, I'm now thinking that for small boxes, I could get by with a coping saw.   Granted, there would probably be more work involved, but I think it may just work.   What would your thoughts on this be?
  Thanks for a good demo lesson!
Trisha
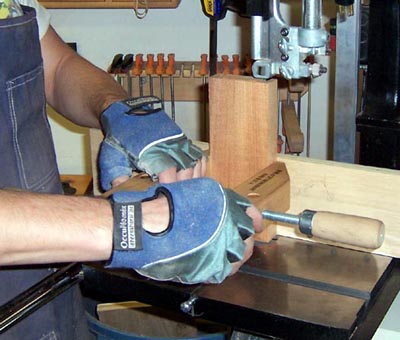
Trisha, sure a coping saw works just fine for jobs like this.

I use my coping saw all the time...   mainly to cut out the waste on my dovetail joints...   it's actually quite effortless with a sharp blade and I say it is just fine if you lack a noisy bandsaw.

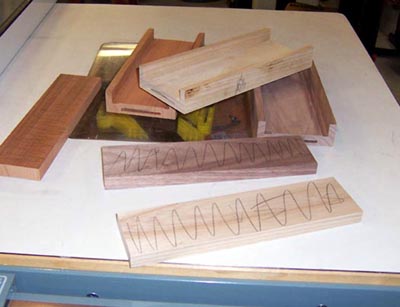
The problem you will discover Trisha is not the effort to do the work...   but the length limitations on your coping saw.

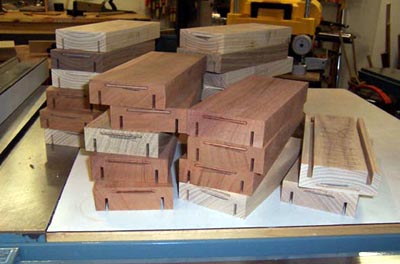
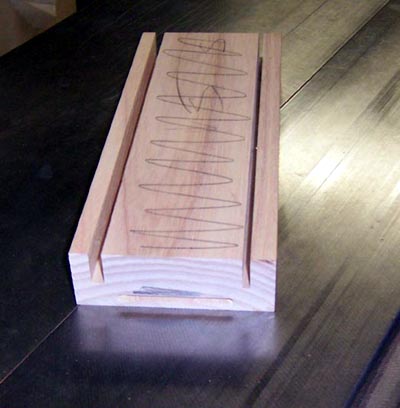
The box bottoms I show here are   8-7/8"   long...   easy to fit into my bandsaw...   but you'll need to find a coping saw with enough throat length to make the same parts.

Of course...   use your own asthethic and make them shorter if needed...   there is nothing sacred about   8-7/8"   long...   except that it allows me to get 4 boxes out of 1 standard piece of 36" long inlay.

Knipfer
Hey, Master, grasshopper here (for those of you too young to understand that, it's from an old TV show), it sounds like you're using a bisket.   Isn't a bisket just a football shaped floating tenon?

And, oh, yes, Master, cool idea!
Joe T
JoeT...   errrr Grasshopper...   please walk softly and quietly over the rice paper and I'll share the secret answer while you kung-fu slay the non-believers...

NOOOOO...   a mortise/tenon joint is NOT the same as a biscuit joint.

First...   tolerances...   a proper M/T joint is sized such that the joint needs glue only to hold it together...   there is no side-to-side slop...   while a biscuit joint has dimensional integrity only in the vertical direction...   you can move the sloppy thing at least 1/8" either way side to side.

Second...   strength...   a proper M/T joint resist all three forms of stress (bending, shear and torsion) as a result of it's close tolerances...   while a biscuit joint fails at shear stress much easier dur to it's sloppy fit.

Third...   well...   this one is more subjective...   but a fine WW making fine boxes (or furniture)...   would always use a true M/T joint over a biscuit because...   uhhhm...   well...   that what seperates fine WW from the rest of the herd???

Soooo...   just because this box uses a floating tenon versus a fixed tenon...   it's still a M/T joint and it's not a biscuit.

Ed...   errrr...   Grasshopper II...   geez I just have to stand in admiration of a guy who argues in logical terms armed with expermiental data on his side...

However...   you have neglected to include one important variable in your experiment...   time Grasshopper II...   time.

Since I create my boxes with every expectation they will last for at least 150 years...   your experiment needs a few more humidity cycles to hold weight in this court of WW!

I will grant that most probably my 3-1/2" wide boxes glued up as you did will PROBABLY last forever...   even without that M/T joint...   so MAYBE it is surperfolous...   and a guy making some for Holiday gifts could probably do without it...

But I'm just a conservative type WW who believes in doing it right and solid so that it WILL FOR SURE last forever...   hence the M/T joint.

Now...   I've already sent my sawdust to Tampa Tom so I'm coming up with something appropriate for you!

Now...   did you get across that rice paper yet without breaking it??

Knipfer
Knipfer,
A little off topic but...   when you put those 5mm hinges on, do you chamfer the back outside edges?   If so, is this done after the hinge is installed?   I have been messing around with your technique and will say it is pretty cool.
Thanks.
goodwood


You have to chamfer them Goodwood to allow clearance for the lid to open.

I make the chanfer on my router table after the hinge holes are drilled.

If you are careful and sneak up on the width of the chamfer...   you'll also get a built-in 95 degree stop for the lid in the open position.

Maybe next time I make a batch of these I'll take the time to show all the steps from raw wood to final boxes...   kind of like a 'build a box with Dave' series...   these are fun boxes and a great skill builder for those folks new at box making.

Knipfer

Go to the next Part of the Series.


This site is maintained by:
Good-Lyddon Data Systems

Copyright © 2004-2010 Joe Lyddon, WoodWorkStuff.net