|
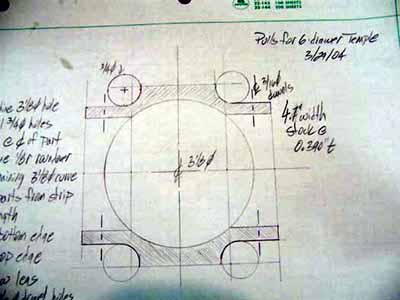
A year or so ago I shared here my technique for making what I call 'strip pulls'. Esentially, strip pulls are wood pulls made using your tablesaw and router table ... and the process involves machining a 'strip' of pull blanks, then cutting the strip into individual pulls as the last powered step. This allows you to safely and efficently make a bunch of identical small pulls at any shape or size you want .... and out of any timber. Anyways ..... strip pulls are great and I use them all the time ..... and I believe that even a few of you have taken up the idea. Lately though I've come to recognize a fundamental limitation of those style strip pulls ..... the final shapes are all based on rectangular forms .... since the table saw is the primary tool to build them. Anyways ..... I was building some of my "Temple" design boxes and wanted pulls for them based on circles ... not rectangles. Soooo ... I re-sawed and stickered some pull material and was heading to the bandsaw to cut them out when my fingers said .... "Dave, we don't want to go there." Seeing as I appreciate having all 10 fingers still attached ..... I stepped back and decided to make them using the same basic strip pull concept .... but make them with circular forms on my drill press. If you enjoyed the recatangular strip pulls .... I'm hoping that this method will give you another area to explore for your own work. Here is how I made them ... First, I suggest you start with a full-scale sketch of your design. |
|
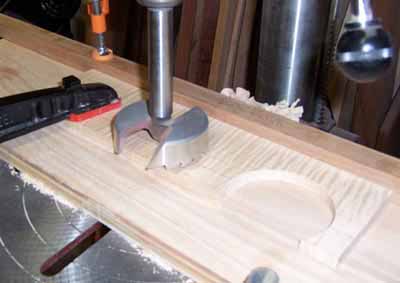
Making the sketch first does many good things for you .. 1. It allows you to 'see' the shape before you start cutting your timbers. 2. It allows you to plan for the exact size of the raw material blank you need. 3. It allows you to measure dimensions directly when you go to lay out the pulls on the timber. 4. And ..... with a photocopier .... the sketch can actually be applied directly to the timbers if you wish to serve as a cutting guide. Anyways ..... you can see my sketch ..... these pulls are going to be based on arcs of two circle sizes .... 3-1/8" diameter and 3/4" diameter. Next step is to locate the center of the larger diameter hole on your timbers and drill them out. |
|
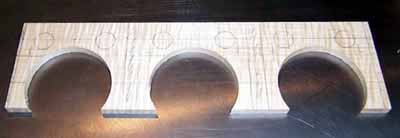
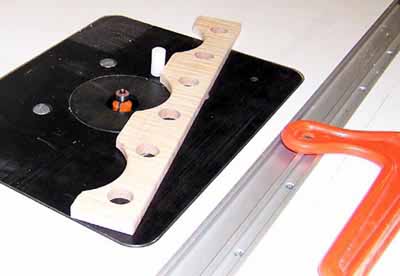
A couple things to note here ... First .... I am being quite wasteful on this batch of pulls in that my material blank is not wide enough to use both sides of that 3-1/8" drilled hole. This is because this is the material that I had ready to go to the bandsaw. By all means ... use your sketch to size your blank wide enough to get two pulls for each large diameter hole. Second ...... there is NO WAY that you are going to hold that piece of timber still against the torque of a large diameter bit spinning ...... place a heavy duty clamp on the blank and tighten it down. Lastly ..... it is a good idea to drill these holes before you lay-out the rest of the cuts needed for the pulls ...... you will most likely find that you will not hit the EXACT center of those large holes when you drill them ..... and since all the rest of the dimensions are based on where these holes are placed ..... you'll be erasing your layout to start over again. DAMHIKT. Once the large holes are located .... go ahead and mark up your blank with all the rest of the layout lines needed for the pulls ..... |
|
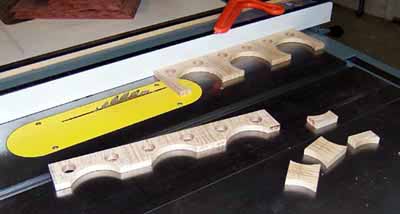
That will be it for the drill press for this design .... now its on to the table saw with the blank. The first step at the tablesaw is to rip your blank in half down the centerline of the large hole. Since I only have half-a-blank here ..... I just ripped a little off the end. |
|
If you can see the offcuts there .... even they have some interesting shapes ... and I'll save them for something. An optional step at this point is to rough-in at the router table a 1/8" radius roundover on the arc edge that was part of the large diameter hole. When these pulls are installed ..... that surface is where your finger tips will go .... and having a nice eased radius at that spot is an elegant tactile touch. You could always just sand the radius in after the pulls are made .... but with a starting pin and pushstick it is a quick and safe operation on the router table .... |
|
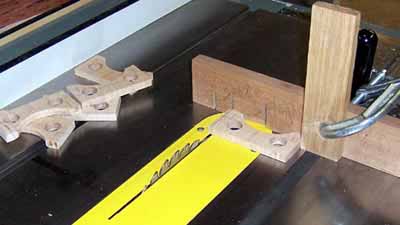
Are they looking like pulls yet? Back to the tablesaw now ..... where I crosscut the blank into individual pull widths. Using a stop-block set on an auxillary fence ensures they will all be the same exact length ... |
|
Then each edge is ripped right at the layout lines to leave the final pull width ..... |
|
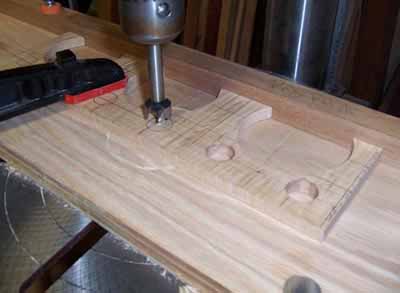
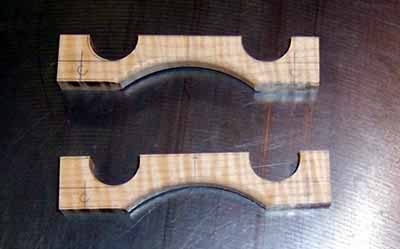
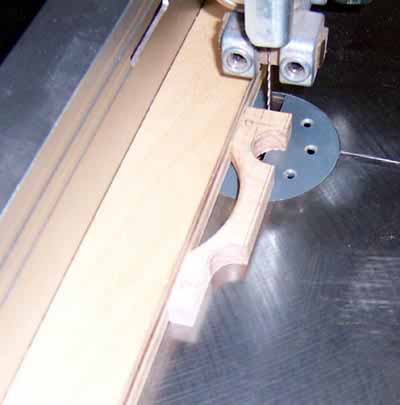
The final power tool step is to remove that piece of material that was part of the smaller diameter holes ... IMHO .... doing that on the tablesaw would be a mighty adventerous way to go about it. So ... I simply chop them off on the bandsaw. The goal with this cut is to have the saw line be such that the bottom edge of that 3/4" hole comes just tangent with the cut line ..... or at least close enough so that you can clean it up later. |
|
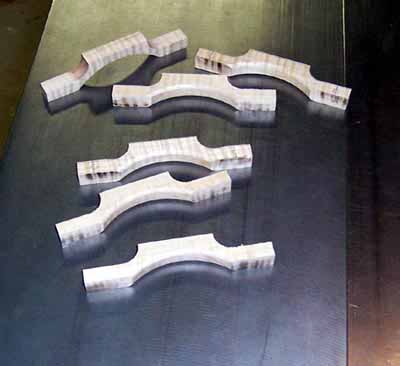
When you get to here ..... you will have some roughed out pulls ..... |
|
Now you need to decide how you are going to attach them to your creation. Since that bottom surface of the pulls is long grain ..... you could simply face glue them to your project with some confidence they will stay there. The boxes I was building were in a Neo-Asian style ..... and for that project it was appropriate to fix them to the drawer fronts with exposed pegs ..... so my pulls ended up with some 3/16" diameter holes drilled through the legs to accept the dowels. However you go about that part ..... now is when you find a comfortable chair in the shop and clean them up till you like them. Here are these pulls ..... proudly gracing the drawer fronts of one of my 6-drawer "Temple" boxes ..... |


|
The design possibilities here are endless ..... bigger holes, smaller holes .... arcs overlapping arcs ...... I say that the only limitation to how these can look is our imaginations and the size of our drill bit collection. I hope this is helpful to someone out there. Enjoy, Knipfer |

