|
The real finishing experts are going to cringe at this reply... but... in my experience... If you are using shellac only as a seal coat... then all the mumbo-jumbo that \ surrounds the topic of applying shellac can be ignored, IMHO. I use shellac as a seal coat on just about everything I make now... and I use the 'Knipfer Rude and Crude' method of application. Here it is... 1. Sand till the visible scratches are gone. 2. Blow or wipe off what dust you can... but don't worry too much about the last little bit of dust. 3. Dip a clean cotton rag in some shellac (1# cut) and wipe the shellac all over the project. 4. Let it sit overnight. 5. The next day it will be rough and lumpy... buff it hard with #0000 steel wool until smooth as a baby's butt. Thats it... a very nice shellac seal coat with no troubles at all. At least, thats my method. This technique will not be satisfactory if you are trying to build a shellac finish... but for a seal coat only, it's the easy and effective way to go. I use a shellac seal coat (1 lb cut of Super Blonde shellac ) because it makes my finished work feel so smooth to the fingers... eliminates any blotching in the timbers with the subsequent oil finish... and brings the timbers to a fine semi-gloss sheen with my oil finishes. Bottom line for me at this point in my WW development... a shellac seal coat over any timber adds to the luxury of the final finish. And it does not have to be complicated... as my rude & crude method attests. The oil still penetrates the wood after putting on the seal coat of shellac ... just not as much penetration as without the shellac . Using shellac, as a seal coat, is a compromise that I knowlingly make to solve other finishing problems. IMHO... Bubinga is a timber that reacts poorly to a straight oil finish... maybe it's due to the natural oil content to begin with? Anyways... my experience has been that a light coat of shellac to begin with allows me to apply my favorite oil finish to Bubinga without much troubles. What I DO give up is some depth of penetration and subsequent grain popping. I also use shellac followed by oil on many other timbers as the first finishing coat... Cherry to reduce splotching... Maple to keep it 'whiter'... Padauk to reduce the dust migration... Zebrawood to make it shine... etc. In each case... I accept slightly reduced oil penetration in favor of the benefits the shellac imparts to the overall finish. At this point, I have been using the oil finish made famous by Sam Maloof ... I mix it up on my own... equal parts Tung Oil , Boiled Linseed Oil, and Poly. I say that a new timber to me is a candidiate for a shellac coat if a straight oil on raw wood finish is either blotchy or soaks up a bunch of oil coats like a sponge without ever truly looking 'finishing'. In my experience, I use shellac any time I use any of these timbers... Maple (hard or soft), Cherry, Red Birch, all Spalted timbers, Padauk, Zebrawood, Ash, Olive, Eculyptus, and a host of less common species. You'll just have to play around for yourself and see which timbers this process helps with in your work. That said... here is what I do... 1. I sand the project to whatever level is needed... 2. I keep a supply of 1 lb cut shellac in my finishing area. 3. My method for applying the shellac is what I call the 'rude and crude' style. A finishing purist would cringe but it works for me... 4. Those will not work in this mixture. 5. The oil finish itself is easy to use... A few cautions are in order here... Thats all I can think of to say... give it a try... you'll enjoy the look of this finish. It leaves you timbers fully finished, smooth as silk, with a lovely light sheen, while maintaining the natural colors and textures. Knipfer DanM. 01-13-2004 10:49 AM Dave, Pardon my ignorance on this subject... I've never used a shellac seal coat, although I'm certainly going to try it! Here are my questions: 1. Does the oil finish still have that grain-popping effect after you apply a seal coat of shellac? 2. Does the application of the oil soften the shellac at all, as a new coat of shellac would? Thanks, Dan daveknipfer, 01-13-2004 08:28 PM TTalma... I don't know how you normally finish your Cherry... but it looks like this with a shellac seal coat and some oil... OK DanM... here is my thoughts on your questions... 1. Yes... 2. Once the shellac is cured it's cured... Knipfer Topic: Shellac BEFORE the Oil to "Pop" the Grain - Picture some Results daveknipfer, 03-12-2004 07:52 PM Recently, I have responded to some finishing questions and suggested my admittidly unorthodox method of finishing highly figured timbers... shellac FIRST... then oil. I recognize that this approach seems wrong... the theoretical idea behind 'popping the grain' is to get as much oil as deep into the timber as you can... But... I stick with my crazy self-learned method... and offer the following photos to give you an idea of what this technique can produce on highly figured timbers. It's difficult to capture 'figure' in a photo... so all of these were much more alive than these photos show... But... tell me... do you believe this grain is 'popped' enough? Ceylon Satin Wood drawer fronts... a 'soft' timber... 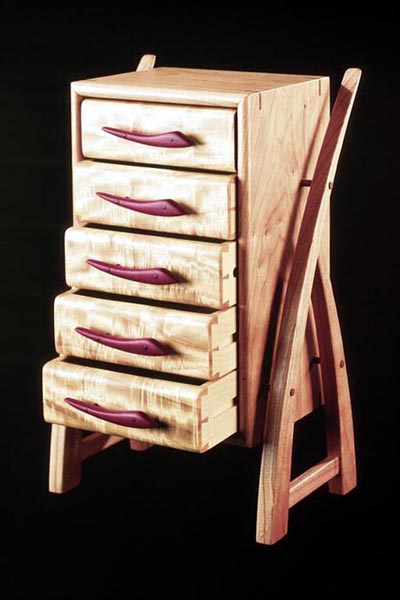 Curly soft Maple drawer fronts... 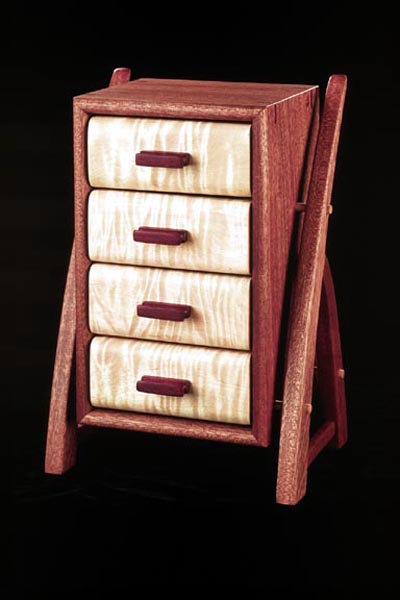 Curly Olive door panels... 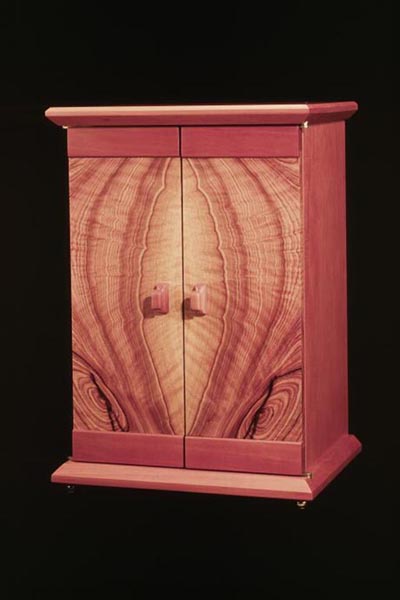 These boxes were all finished the same way... my 'rude and crude' shellac coat followed by 6 coats of home made oil. Sooooo... next time you have a fine piece of figured timber in your hands... I say that you owe it to yourself to at least give this method a try... it's a foolproof way to achieve what I believe is a pleasing finish... as long as you don't mind a little honest elbow-grease effort. Knipfer   This site is maintained by: Good-Lyddon Data Systems Copyright © 2004-2010 Joe Lyddon, WoodWorkStuff.net |